
A wardrobe can look simple until it has to pass through a doorway. Its height, weight, mirrors, sliding tracks and weak joints all affect the safest removal method. Plan the object and the route together. The useful question is not merely whether the wardrobe fits in the truck, but whether it can leave the room without damaging the furniture, the property or the people carrying it.
Decide whether the wardrobe stays intact
Start with its construction. A solid freestanding wardrobe may tolerate movement as one piece if the route is wide and the structure is sound. Flat-pack furniture often becomes less stable after years of use and may twist when lifted. Built-in units are part of the room and need a different assessment. Sliding-door wardrobes may contain heavy glass or mirrored panels that should be removed before the carcass moves.
Open the doors and inspect the inside. Look for visible screws, cam fittings, brackets, rails and separate top or base sections. Check whether the back is thin board fixed with nails or staples. Photograph the joints before taking anything apart. If the wardrobe will be reused, those pictures help with reassembly. If it is being disposed of, they still show where panels may separate safely.
Do not assume dismantling is always easier. A well-made cabinet can become a collection of large, awkward panels with exposed fasteners. Conversely, forcing a tall wardrobe through a narrow turn can damage both the item and the doorway. Measure first, then choose the smallest amount of dismantling that creates a controlled route.
Empty and inspect every compartment
Remove clothes, boxes, hangers, drawers, shelves and loose rails. Check the top, the space beneath the base and any hidden drawer. Wardrobes often contain documents, jewellery, keys and fittings that are easy to miss. Keep personal belongings away from the removal pile so nobody has to decide ownership during the carry.
Take out adjustable shelves and wrap glass shelves separately. Secure or remove drawers. A drawer sliding open while the wardrobe is tilted changes its balance and can strike a wall. Bag shelf pins, screws and reusable fittings by section. Avoid one mixed bag for the entire room if several pieces of furniture are being dismantled.
Inspect for moisture, mould, pest activity or damaged panels. Tell the removal provider about any condition that changes handling. A water-damaged base may fail when lifted. A cracked mirror needs specific protection. Honest photos prevent a crew from arriving with a plan based on a clean, rigid cabinet that no longer exists.
Measure the wardrobe and the route
Record height, width and depth at the largest fixed points. Include handles, trim and projecting feet. For sliding doors, measure the complete frame, not only the cabinet body. Then measure the room doorway, entrance door, corridor turns, lift opening and lift interior. Check ceiling height where the wardrobe may need to rotate.
Walk the route with the wardrobe’s dimensions in mind. Door closers, ceiling lights, handrails and wall cabinets reduce usable space. A long panel can pass through a narrow doorway but fail at the turn immediately outside it. Photograph the tightest points from both directions.
If the property is in a tower, confirm the service-lift booking and loading route before setting the collection time. The bulky-item tower checklist covers the full path from room to loading bay. Share the route information when arranging furniture removal, together with photos of the wardrobe and its construction.
Remove mirrors and doors with care
Mirrored doors are often the heaviest and most vulnerable parts. Do not rely on adhesive film or a blanket alone to make cracked glass safe. Identify the door-retention method, support the panel before releasing it and keep it upright in a protected area. Sliding doors may lift out of tracks; hinged doors need their weight supported while hinges are removed.
Mark the order of doors and hinges if the unit will be reassembled. Keep fittings with the correct door. Protect corners and handles, but do not wrap so heavily that safe handholds disappear. Never lean an unsecured mirror in a shared corridor where it can be knocked.
If a panel is too large or damaged to handle normally, stop and reassess. Cutting, breaking or destructive dismantling creates sharp material and should only be used for authorised disposal with suitable containment. It should not happen in a lift lobby or common hallway.
Dismantle in a controlled sequence
Remove loose internal pieces first. Then take off doors, rails and detachable trim. Support the top and side panels before releasing structural fasteners. A wardrobe can collapse suddenly when its back, top or cross braces are removed. Keep enough fixings in place to hold the frame until carriers are ready.
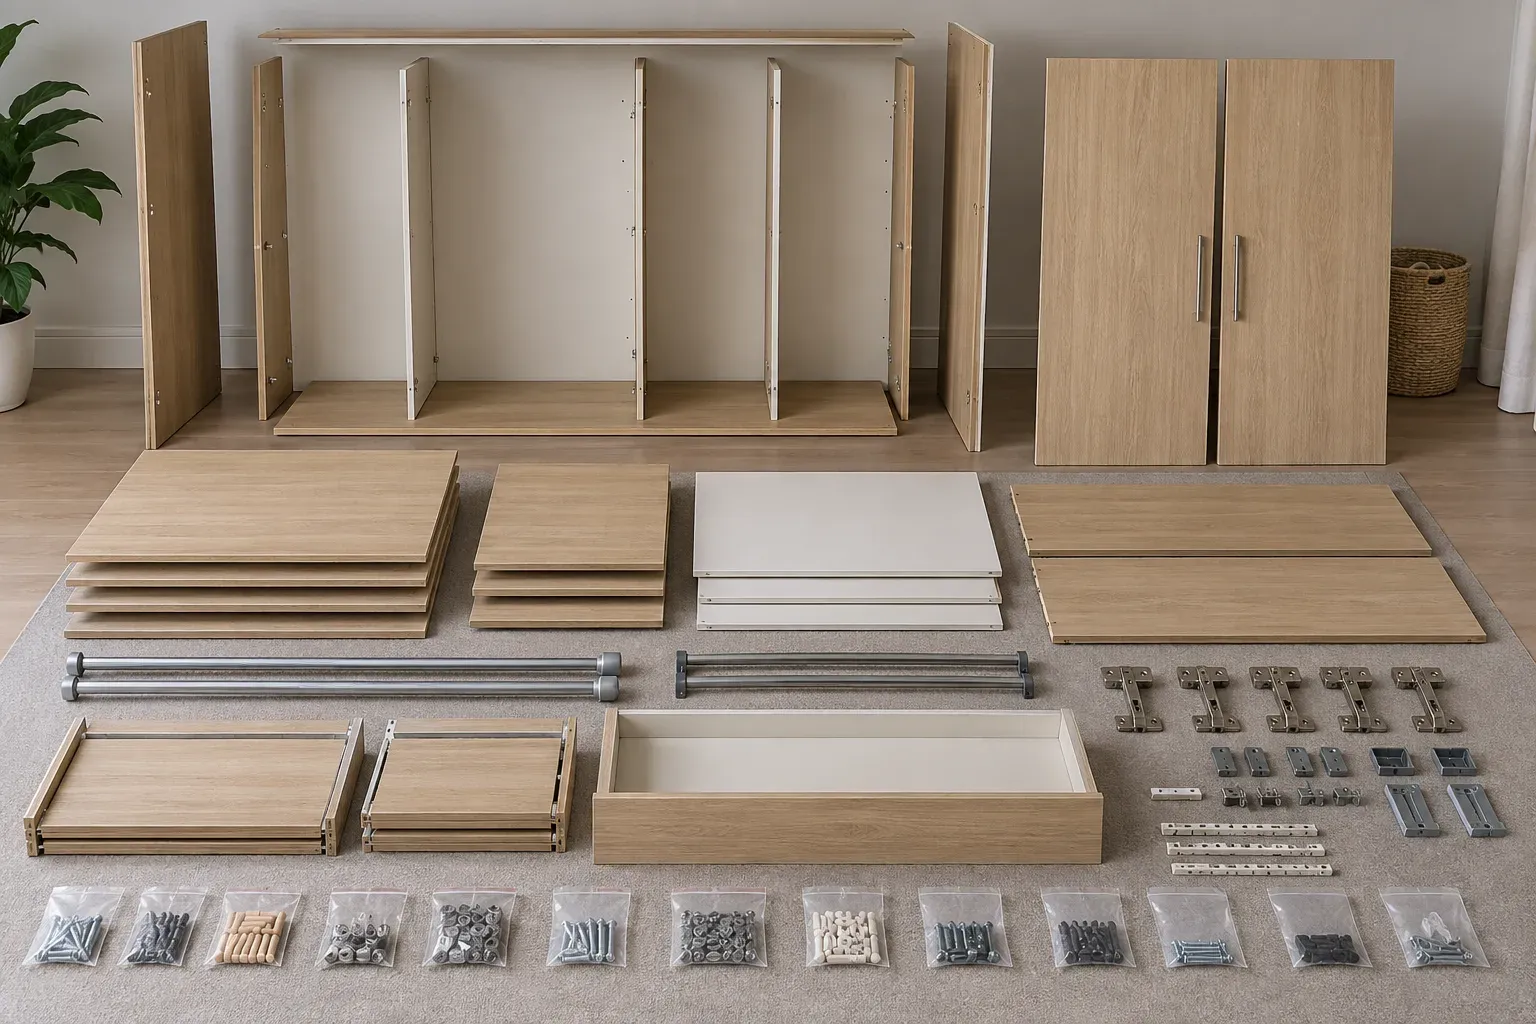
Lay panels flat on protection where space allows. Do not stack tall piles that hide damage or mix pieces from other furniture. Cover exposed metal fittings. Bundle similar rails without allowing tape to touch a finish that must be preserved.
For disposal, the sequence still matters. Controlled panels are easier to carry and load than a broken heap. Keep nails, staples and screws contained. Sweep the working area before the next large item moves so nobody kneels or steps on hidden hardware.
Protect the room and common areas
Clear rugs, bedside tables, lamps and wall decorations from the working route. Open doors fully and secure them. Use property-safe corner and floor protection where needed. Avoid reducing a narrow route with excessive padding.
Ask building management what protection it requires in corridors and lifts. Some buildings provide lift pads; others expect the contractor or resident to arrange them. Keep door sensors, lift controls and fire doors clear. Protection must not interfere with building systems.
Take condition photographs if the building requires a pre-move inspection. Report any new damage immediately. After the wardrobe leaves, check the bedroom, corridor, lift and loading area for loose fittings, packaging and marks.
Arrange building and vehicle access
Confirm whether a service-lift reservation, move permit, contractor details or deposit is required. Get the loading entrance and approved vehicle location. A wardrobe dismantled into panels still counts as bulky movement and may be restricted to service access.
Allow time for security check-in and lift control. Do not use the entire permission window as estimated carry time. If multiple wardrobes or other furniture are leaving, tell management and the provider. Repeated lift trips require a longer slot than one cabinet.
In a villa, clear gates, paths and stairs. Move vehicles that block the closest exit. Keep pets away from the work area. Identify any outdoor steps or narrow side passages before the team starts carrying panels.
Reuse, relocation or disposal
The intended outcome changes the method. A reusable wardrobe needs labelled parts, protected finishes and complete hardware. Confirm the destination measurements before dismantling; there is little value preserving a unit that cannot fit its next room.
For a sale or donation, do not treat interest as confirmed collection. The recipient must agree to the condition, dimensions, dismantled state and pickup time. Set a deadline before a move-out or replacement date. If no reliable recipient exists, arrange removal rather than leaving panels in a corridor.
For disposal, list every section in the quote. A large wardrobe occupies substantial vehicle space even as flat panels. Include mirrors, drawers and attached dressing units. Do not add a second wardrobe on collection day without checking capacity and price.
What the quote should include
A clear quote identifies the wardrobe, access, dismantling need and other items. Ask whether carrying, basic dismantling, stairs and removal are included. State whether the unit must remain reusable. Share the fixed building slot or handover deadline.
Send a wide room photo, close-ups of fittings and route photos. Mention fragile panels, a damaged base or unusually heavy material. If the provider needs a site assessment, complete it before the lift booking rather than on collection day.
Agree how changes are handled. Extra furniture, longer carries or specialist dismantling can change the work. Written scope prevents confusion when the truck arrives.
Common wardrobe-removal mistakes
- Leaving clothes, drawers or glass shelves inside.
- Measuring the doorway but not the corridor turn or lift opening.
- Removing structural screws before supporting the frame.
- Mixing all hardware from several items in one bag.
- Leaning mirrors or panels unsecured in a common area.
- Assuming flat-pack furniture will survive another assembly.
- Booking the crew before confirming service-lift access.
- Describing a fitted unit as a freestanding wardrobe.
These problems usually begin with rushing. A short inspection and route check determine whether the wardrobe moves intact, in designed sections or as controlled disposal panels.
Collection-day sequence
Before arrival, empty the wardrobe, separate personal items and clear the route. Keep building approval, access cards and contact numbers ready. Use the pre-arrival checklist to confirm parking, lift access and the final item list. Do not dismantle beyond your confidence; an unstable half-disassembled frame can be harder to manage than an intact cabinet.
When the team arrives, show the complete item and route. Confirm whether it is for reuse or disposal and point out fragile or weak sections. Let the carriers decide orientation and lifting positions. Keep other people out of the working corridor.
After removal, collect hardware, inspect the wall and floor, and check common areas. Return building access items and complete any condition sign-off. The job is finished when every wardrobe component has left, the route is clear and nothing sharp or personal remains behind.
Planning several wardrobes
For a full bedroom or villa clearance, number each wardrobe and its parts. Photograph every unit separately. Decide an order that creates working space and keeps the main route open. Avoid dismantling all wardrobes at once and filling rooms with mixed panels.
List dimensions and materials for each unit. A small solid-wood wardrobe may be harder to carry than a larger flat-pack one. Mirrored sliding units need more protected space. Built-ins may require separate specialist work before a general collection.
Plan vehicle volume honestly. Flat panels still occupy length and need stable stacking. Mirrors cannot simply sit beneath other furniture. The provider can choose crew size, equipment and loading order only from a complete inventory.
Wardrobe removal checklist
Use this final check before confirming the appointment:
- Empty every compartment, drawer, shelf and hidden storage area.
- Photograph the wardrobe closed, open and from both sides.
- Record its height, width and depth, including trims and handles.
- Measure the bedroom door, corridor turns, lift and loading entrance.
- Identify mirrors, glass shelves, stone tops and loose decorative pieces.
- Confirm whether it is freestanding, wall-secured or fully fitted.
- Decide whether the priority is reuse, relocation or disposal.
- Tell the provider about damage, water swelling or unstable panels.
- Confirm the service lift, access time and approved vehicle location.
- Keep labelled hardware with the correct unit if it will be rebuilt.
This information lets the provider plan the carrying orientation, protection and dismantling sequence before arrival. It also makes the quote easier to compare because the scope describes the complete wardrobe rather than a vague furniture item.
Questions customers often ask
Can a wardrobe be removed without dismantling?
Yes, when the cabinet is rigid enough and the complete route has enough width, height and turning space. The crew still needs safe lifting points and an approved lift or stair route. A measurement that works at one doorway does not guarantee the full path works.
Should I dismantle the wardrobe myself?
Only if you understand its construction and can keep the frame supported throughout the work. Emptying it, taking photographs and clearing the route are usually more useful. Stop if a panel carries glass, the unit becomes unstable or the fixings are concealed.
Can a fitted wardrobe go with normal furniture removal?
A fitted wardrobe may need a carpenter or renovation contractor to detach it from walls, ceilings, flooring or electrical features. Tell the removal provider it is fitted before booking. The loose sections can be assessed for collection after safe disconnection.
What happens to mirrored doors?
They need separate handling, edge protection and stable transport. Show the mirror size and frame condition in the quote photos. Cracked, loose or exceptionally large glass may require a specialist route.
How far in advance should I arrange removal?
Book after you know the item, access rules and target date. Towers may need more lead time for permits and service-lift reservations. Leave a buffer before a tenancy handover or delivery of replacement furniture so one delay does not block the next appointment.
Wardrobe removal becomes predictable when construction, condition, route and destination are known. Empty it completely, measure the real restrictions and dismantle only with a supported sequence. That keeps a large bedroom object from turning into loose panels, lost hardware and a blocked lift.